Back to Home Page
NewChallengerStore.com
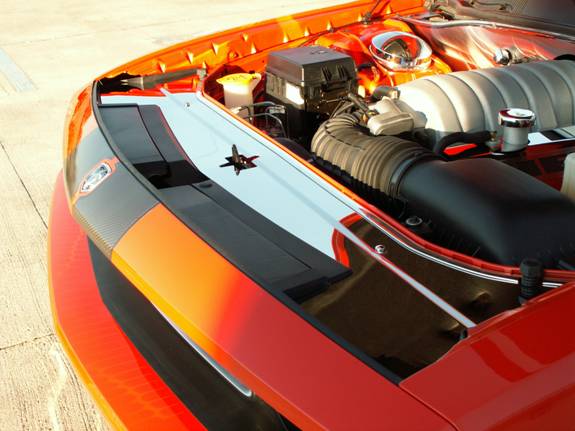
Dodge Challenger Header Plate
Part #
ACC-153007 - CHHP300
PARTS INCLUDED:
1 x
Stainless 4pc Header Plate
2 x Replacement Flat Head Bolts
2 x 1/4”20 Stainless Nuts
4 x 3/4Stainless #8 Flat Head Screws
2-3/8 x Stainless #8 Flat Head Screws
2 x Polished Stainless #8 Oval Head Screws
The new challenger header plate has been designed to fit into the factory black plastic header covers and will remain in place for this installation. This part has been designed to fit the challenger that has the factory gas props. If you vehicle has the physical steel prop bar this will need to be removed. Although it is possible to drill the new header and reinstall this prop bar it is recommended that you order from Chrysler the factory gas props for the best looking results.
Your cover comes to you with a protective liner. Do not remove liner until prompted by instructions.
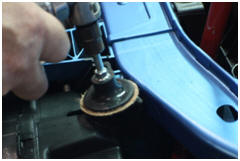
1. The first thing we will need
to do is to create some much needed clearance. Remove the two black
plastic header plates. you will notice two studs at the side of each
panel. Trim off the one stud closest to the front of the car and
leave the back one in place. you will need to sand flush the front
cylindrical parturition just under the panel. See picture
Set #1. This
will allow the plastic panel to sit closer the headlight.
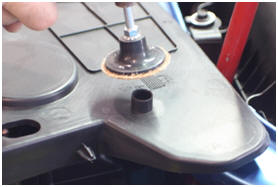
See picture Set #1
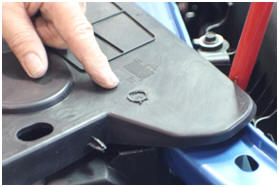
2. The next spot to grab some clearance will at the headlight bracket bolted to the radiator support rail and the crisscross bracket of the rail itself. these two areas will need to be sanded down about a quarter inch at both ends of the header area. See picture Set #2.
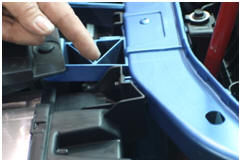
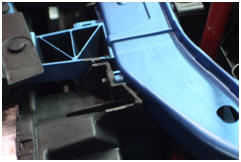
See picture Set #2.
3. Once these mod's have been made reinstall the plastic header fill. You should not be able to see the modifications you have made. Place the larger section of the new header plate into position over the black plastic factory header plate. You will notice four counter sunk holes in the new header closest to the center. Pilot these four holes using a 9/64'' drill bit. Blow away the drill shavings and then install the four 3/4''#8 flat head screws provided. Carefully pilot the two remaining holes at the ends of the header plate making sure not to pierce the headlight itself. Be especially careful not to over tighten the two end screws as they will be installing in a very soft plastic and can strip very easily. Just snug will work fine. Remove the protective liner from this main section. Install the two circle inserts provided and remove the protective liners from them as well.
4. Mark the height and then remove the two factory hood stops and set them aside for a moment. Place the second section over the first section and align the two sections. Pilot the two hole locations in this top section though the chrome trim into the factory radiator support and blow away the drilled shavings. Install the two stainless polished screws provided until the top plate is nice and secure. You should only need to snug these two screws. Reinstall the two factory hood stops to their proper height locations.
Do not close the hood just yet....
5. You have been provided with two large head replacement bolts. These bolts will create much needed clearance between the hood and the new header. One at a time, remove the factory bolts that hold the hoods catch bar. NOTE: These will not be reused. Slip the new bolt through the bolt hole and then finger to the stainless nut through the catch opening onto the new bolt and then tighten. Remove the protective liner from this last part to finish the installation.
CARE AND MAINTENANCE:
Care must be taken
when cleaning your cover. It is a good idea to lightly dust your
cover with a clean soft cloth first in order to prevent any
particles from scratching it. Then wipe (using a new clean soft
cloth) with a good quality streak free glass cleaner.
For Help - please call 352 688 8160 or email
us at admin@NewChallengerStore.com
NewChallengerStore.com a HotCarAccessories.com website
Not affiliated with
Dodge, Chrysler Corporation
or it's divisions.